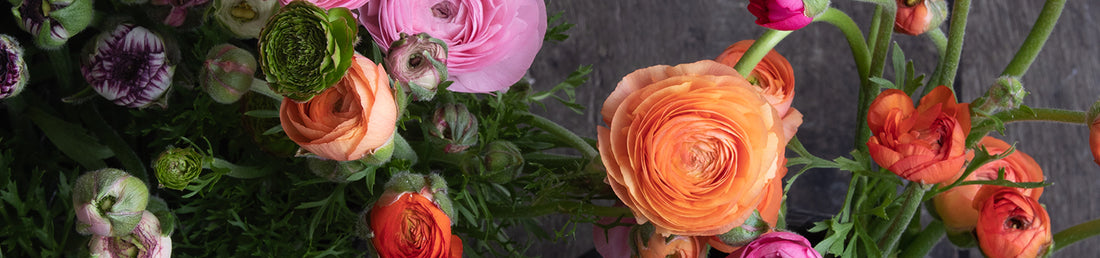
Ah, the beloved ranunculus. Whether it is the swirling crepe petals of the Italian varieties or the ethereal winged butterfly varieties bred by the Japanese it is hard to imagine a flower quite as romantic. The Ranunculus asiaticus grows natively in areas such as Northern Africa, Western Asia, and Southeastern Europe (such as Greece) where they enjoy temperate climates and mild wet winters. They are hardy in zones 8-10 and in the U.S. they grow well in areas such as Central and Southern California.
These climates, however, are a far cry from the weather here in the Piedmont of North Carolina. We live in zone 7b/8a and are well known for our weather extremes. We experience mild winters with average temperatures between the mid-30s to mid-50s but tend to have a very short period of "springtime” conditions before we jump into the humid swelter of summer. By March we are easily reaching the high 60’s low 70’s. These extremes make some of the least favorable blooming conditions for the ranunculus which tends to thrive in temperatures below 60. And just to add insult to injury our soppy clay soil loves to drown the little darlings. So really I should just put in a plug for growing natives at this point and walk away…..but I just can’t resist the idea of not seeing those ruffly little faces come spring.
Not all is lost, growing bouquet-quality ranunculus here in the Piedmont of North Carolina can be done with a little grit and determination. I have trialed a few different ways of growing ranunculus and in this post, I will outline what has worked best for my environment. As with anything in the garden, the effect of the environment on plant growth cannot be overstressed. The exposure to water, temperature, light, and nutrients in your growing environment is unique and all affect the outcomes of your specific plantings.
Due to our short springs, I have found it best to plant ranunculus in the fall time. They do not have a lot of vegetative growth during the winter, but planting in the fall allows them to establish a strong root system permitting them to grow and bloom in very early spring (usually) before the heat intensifies. They will grow if spring planted here, but the quick heat usually makes for shorter stems and blooms that tend to be smaller and “blown open” really making them unusable for bouquets.
In the next few sections, I will outline my process for overwintering my ranunculus from pre-sprouting, planting, and protection from harsh weather, pests, and disease.
Pre-Sprouting
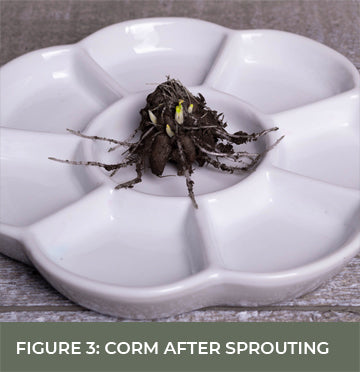
Ranunculus grow from corms (although they can grow from seeds too). Corms are technically made from the same tissue as the plant stem and contain nodes, internodes, and buds just as a regular stem would. If given the right conditions these corms will produce "adventitious roots" which just means roots that have sprouted from any "non-root" tissue type (in this case stem tissue). To pre-sprout corms you essentially simulate the conditions in which they like to grow thus causing them to form sprouts and shoots, indicating their potential to grow and produce the beautiful flowers we crave. Pre-sprouting ranunculus is absolutely an optional step. I prefer to presprout them, but I have also planted them without pre-sprouting. Honestly, it all comes down to whether I have the time. If possible, I try to do it just to know that I am planting a viable corm into limited growing space. Pre-sprouting also helps me weed out corms that may be infected with pathogenic fungi or bacteria (you can see a rotted corm to the right that I was able to weed out) The warmth and humidity of the south paired with our poorly draining soils provide ideal conditions for proliferating fungus and bacteria. Since we use organic methods I find that scouting and prevention are one of the first lines of defense against pests and disease. When you receive corms from your supplier they come looking (to me at least) like creepy dead and dried-up spiders. Which is appropriate since I usually start the pre-sprout process around Halloween. In this state they are dormant. In their natural Mediterranean habitat, this is the state in which they would hang out dormant during the dry heat of the summer waiting for a wet mild spring to plump them up and shake them into action. Therefore, the first step to pre-sprouting is to plump them up just as the rain would in spring. If you skip the pre- sprouting and just plant them in the ground you would need to provide them with moisture (via a good soil drench) when first planted. Picture 1: Dried Corms Picture 2: After Soaking Picture 3:


Pre-Sprouting Steps
Step 1:
I first gather up a bucket, fish tank bubbler, garden pen and label, mesh bag, potting medium for sprouting, and a container in which to sprout them. I prefer to soak my corms not all in one batch since I don't want to cross-contaminate if one variety contains a pathogen. As to supplies, you can soak your corms in any container. Just make sure there is room since they will swell and, in some cases, become twice their size once plump.

Step 2:
I make my labels for each variety. For this, I prefer to use a plastic label since it will not rot in the soil (as I learned the hard way that wood will). I also use a special garden marker that will withstand all elements & not fade. There is nothing more frustrating than having an entire batch of plantings and having no idea what is what! If you can find matte plastic labels you can write on them with a pencil, and it will stay just as well. Matte labels that are tall and sturdy are hard to find though.

Step 3:
I place my corms in organza bags to keep them separated and place the label in the bag securing the top. The bags I use are the same ones I use to protect precious blooms from bug damage (especially Japanese beetles) in the summertime. Nothing better than getting two uses for one product.

Step 4:
I prepare my bucket by filling it with clean water and weighting down the bubbler tubing to the bottom. The bubbler keeps fresh oxygen in the water during the soaking process. Alternatively, you can place the bucket under a faucet and allow a trickle of water to flow into the bucket

Step 5:
Place the organza bags into the bucket and leave them to soak. According to the handbook on Specialty Cut Flowers by Armitage & Laushman, the soaking period can be anywhere from 2-12 hours. Since soaking too long can rot the tubers, I tend to air on the side of caution and pull them out after about two hours.

Step 6:
Mix up your potting medium. I generally use whatever I have on hand in this case I had a bag of peat moss that I used. You can also use vermiculite since the sustainability of peat moss has come under question. The key here is not to oversaturate the medium since too much moisture can cause tuber rot. If you take a handful of your wetted medium and squeeze you should only be able to squeeze out a few drops of water. I also mix an OMRI-approved bio fungicide (RootShield) into my wetting water (totally optional). Biofungicide (in this case Trichoderma harzianum strain T-22) acts by inoculating the roots of the ranunculus and protecting them by competing with pathogens for access to the root and secreting an enzyme that breaks down the cell walls of certain harmful pathogens. The inoculated corms will carry this protection into the garden soil.

Step 7:
Layer a bit of potting medium in the bottom of your tray (the tray does not have to have holes since you will not be watering them). Place the plumped-up corms on top of this layer and cover with more potting medium and your label.

Step 8:
Place the corms in a cool place and allow them time to pre-sprout. I place mine on the grow racks in the garage (lights not on). Armitage & Laushman suggest 10 days at 62 degrees. I have pre-sprouted in cooler conditions (mid 40-50’s) but they do caution against anything warmer than low 60’s since ranunculus intensely dislike soil temps >60 and will rot more easily. This is yet another reason they don’t fare as well when spring planted in the south since our soil reaches those temps quickly. Cool soil temps are also the reason I wait until November/December to put them in the ground in the fall since our temps generally lower to the 50’s by this time.

Step 9:
Watch and wait for signs of life. I generally don’t even look at them for a week. After a week I start looking for signs like pushed up potting soil and sometimes a wee little shoot or two. When I see this, I usually know it's time to pull them out and put them in the ground.

Planting
The number of flowers produced by each corm is largely dependent on its size. Armitage & Laushman suggests 5/6 cm corms for best results. The corms should be planted with the claw-like projections facing down and the crown should be 1-2 inches below the soil surface. Deeper planting can lead to delayed or even non-emergence (Armitage & Laushman, 2003). I have found in our heavy clay soil it is better to plant into amended raised beds to promote water drainage and lessen the opportunity for corm rot.
Spacing should be based on your environmental factors and can be anywhere from 6-10 inches. I plant my corms with 6-inch spacing because I have such limited growing space, but some of the larger varieties like the butterfly ranunculus I place at 9-inch spacing.
I water deeply at the first planting, but then generally leave them alone until they are well established and are showing a good amount of vegetative growth. Most fall plantings do not require much extra watering until the spring when they begin to break dormancy, but we do hit some warm dry days during the winter & I occasionally will run the drip tape depending on how dry the soil feels. I find the best test is just to dig into the soil and assess the moisture levels every so often while overwintering. When spring comes and they put on signs of growth it is best to assess the soil frequently since watering needs increase significantly at this point.
Fertilization should be based on the needs of your soil. We do soil testing before fall planting and add organic amendments when there are deficiencies. While clay does not drain well it does hold onto nutrients and we have enriched it with compost over the years, so we usually don't require much in the way of amendments. I do; however, feed with fish emulsion via our drip system when spring growth starts.
Soil health and fertility are something unique to each garden and can cause problems when they are not in balance. Much like human counterparts, plants are what they eat and what they eat comes from the soil. We consulted outside help to develop our organic soil fertility program and I have found it to be well worth the investment. Responsibly nurturing a healthy soil biome is the key to healthy plants and beautiful flowers.
Protection
Winter protection has been one of the biggest hurdles when it comes to growing ranunculus. We live within city limits and a high tunnel just isn't something within reach. For that reason, I overwinter my garden under low tunnels, in raised beds, covered with greenhouse plastic. I have tried to use just frost cloth but lost many plantings due to severe dips into the teens. I also tried just polytunnels in the field but found that ventilation was near impossible and led to problems with powdery mildew. So, this year we have installed manual hand cranks to roll up the sidewalls easily and quickly. I monitor the temperature and humidity inside the tunnel with a TempStick that transmits data wirelessly and allows me to set limits for alerts. Much of the time the sidewalls are open, but we recently survived a night down to 10 degrees under the tunnel with an additional layer of frost cloth and had no loss whatsoever. If nobody is around to raise the sidewall, I have installed wax cylinder vents that automatically open if it gets too warm inside the tunnel (only useful for emergency venting). I have positioned the bed so that it receives afternoon shade and in spring I can remove the plastic and add shade cloth to keep temperatures from soaring too high.

Pests & Disease
WPest and disease issues will vary from location to location. I have found our most common pests to be aphids early on, but I usually let our ladybug population or a stiff spray of water take care of them. My biggest battle is powdery mildew on the ranunculus which is by no means fatal, and there is no doubt that it is proliferated through my close spacing. Usually by the time powdery mildew sets in it is time to let the ranunculus die back after which we cut down and trash the vegetation. And while I have not experienced it Armitage & Laushman do mention Botrytis, Sclerotium, Pythium, and Phytophthora which are mostly attributed to growing in overly damp conditions.
Rewards
If all goes well in the spring, you should be rewarded with some real ruffly beauties. For the longest vase life harvest when the buds are just starting to show color. I find this especially step especially important here in the south where the flowers can blow open quickly in the heat, but when harvested at this stage the ranunculus can last an amazing 7-10 days in the vase!

Resources and Further Reading
Armitage, A. M., & Laushman, J. M. (2003). Specialty cut flowers: The production of annuals, perennials, bulbs, and woody plants for fresh and dried cut flowers (2nd ed.). Timber Press.
USDA, Agricultural Research Service, National Plant Germplasm System. 2023. Germplasm Resources Information Network (GRIN Taxonomy). National Germplasm Resources Laboratory, Beltsville, Maryland.
URL: https://npgstest2.agron.iastate.edu/GrinGlobal/taxon/taxonomydetail?id=30814. Accessed 21 January 2023.
Francis, J. (n.d.). RootShield ® WP Technical Bulletin.
Retrieved January 21, 2023, from https://bioworksinc.com/wp-content/uploads/products/rootshield-wp/how-rootshield-wp-works.pdf
Leiss, J. (2021, November 24). Early season income with ranunculus and anemones part I&II. Growing for Market. Retrieved January 21, 2023, from https://growingformarket.com/articles/early-season-income-ranunculus-and-anemones-part-ii#.